TL;DR
The PWK course included in the OSCP package is a course I recommend to anyone with even a passing interest in penetration testing, whatever their technical level. The lab environment is heterogeneous and lets you work on “simple” methodologies such as network reconnaissance, as well as more advanced mechanisms such as double pivoting with firewalling. Passing the exam, on the other hand, will mainly depend on the quality and quantity of the preparation you put in. Initial technical skills are, in my opinion, a secondary factor.
Introduction
This article explains the approach I took to prepare for this certification. Keeping a detailed logbook didn’t seem relevant to me; I will nonetheless give you a few rough time markers. I would also point out that this article does not contain any confidential information about the OSCP lab or exam. Finally, this article is purely subjective. It reflects my personal point of view and is set within a specific time frame (certifications evolve quickly). That’s why I also encourage you to read other reviews, such as ACKNAK’s article.
This article complements the talk I gave at Hack2G2, available below:
The slides are also available here.
Why a certification?
Why take a certification?
Having completed my cybersecurity engineering degree, I wanted to make the most of my personal experience and my 3 years of work-study in pentest. The demand from employers and clients for “certified” pentesters is a factor that reinforced my decision to take a pentest certification. Finally, a certification like the OSCP was a personal accomplishment that I had long wanted to add to my resume.
Why take one “now”?
It’s September 2020. The end of my studies and the slowdown of my CTF team Aperi’Kube freed up some time for me. The lockdown imposed to fight the global COVID-19 pandemic was also the perfect opportunity to take such a time-consuming certification. So I decided to dive into technical preparation shortly after finishing my studies.
Which certification to choose?
Choosing a technical certification generally depends on several factors:
- The content of the associated training
- Its reputation
- Its difficulty
- Its price
- Others (company needs, client needs, …)
Some proprietary certifications have no alternative; in that case the question of choice doesn’t arise. When it comes to cybersecurity (and especially pentest), there is a multitude of certifications with different characteristics.
To catalog these various certifications, community projects such as Security Certification Roadmap have emerged:
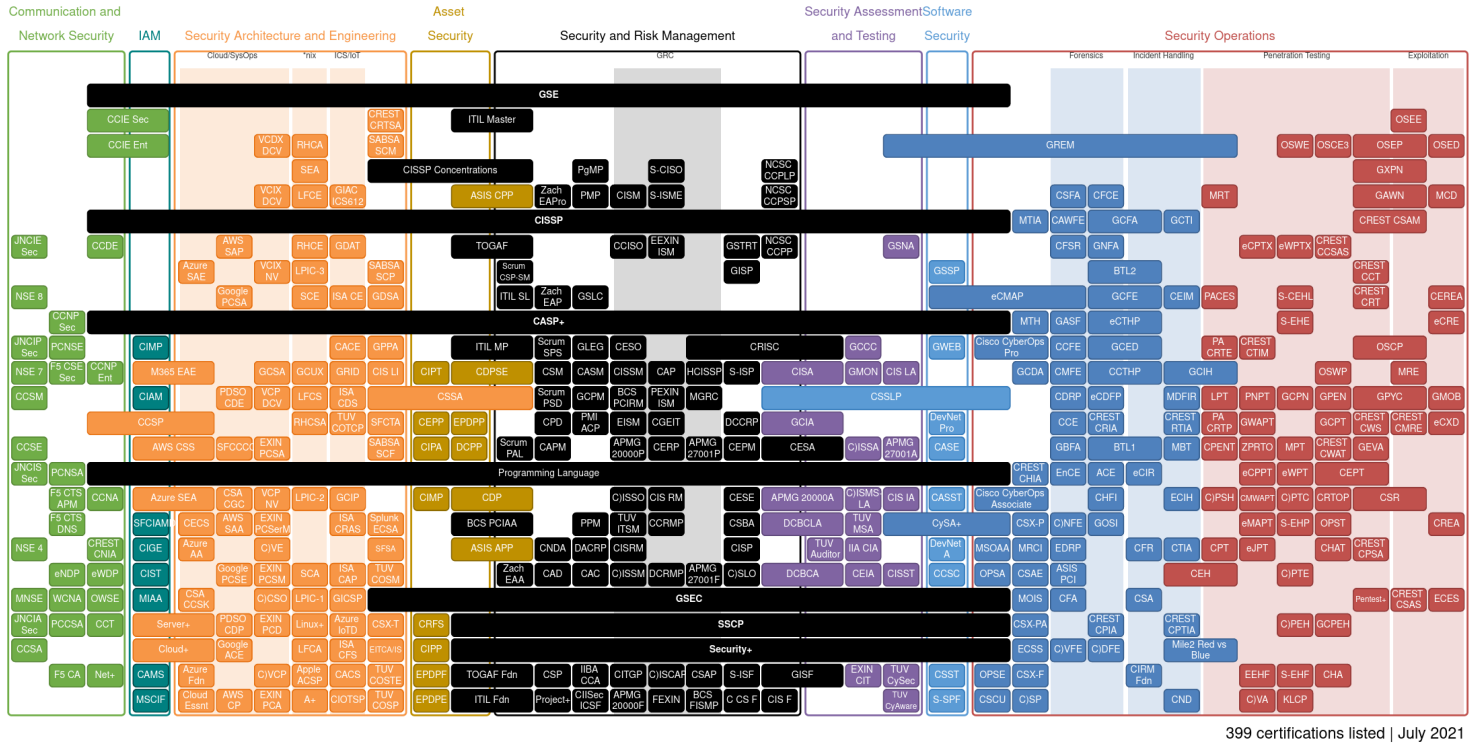
I won’t cover every certification in this article, but I do want to discuss 2 organizations that caught my attention.
EC-Council - CEH
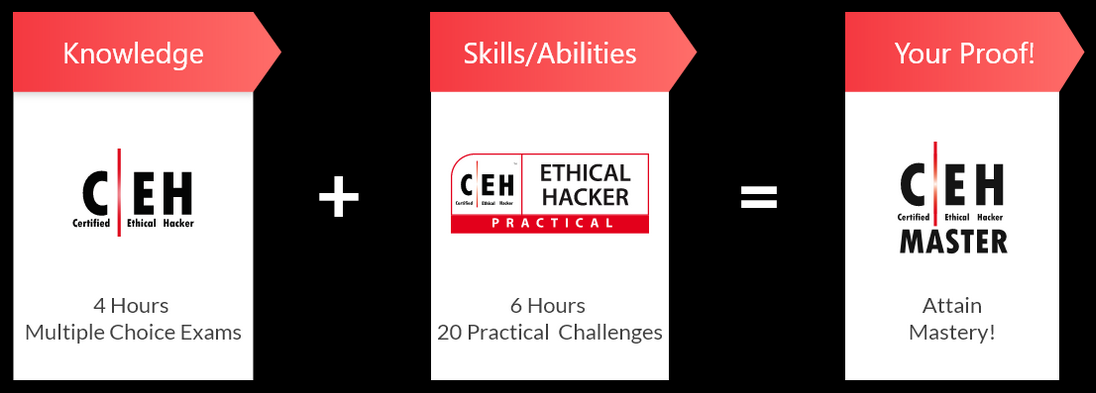
The company EC-Council recently released a new version of its “Certified Ethical Hacker” certification: CEHv11. This certification, once based on a 4-hour multiple-choice test, has recently added a 6-hour practical exam with about twenty challenges.
- Pros
- The range of technologies covered seems broad (WPA3 cracking, pentest lab, Reverse Engineering, …).
- Students can choose to take either the multiple-choice or the practical certification (or both).
- The introduction of the CEH “Practical” has improved the certification’s image.
- The CEH certification is sometimes better known to clients than the OSCP.
- Cons
- The communities I talked with tended not to recognize this certification, feeling that the technical level on offer was too low to put on a resume.
- The business model relies in part on an annual financial renewal to keep the certification valid.
Let me reiterate that this is a purely personal opinion. I encourage you to visit the organization’s website to form your own opinion.
eLearnSecurity - eCPTX/eWPTX/eJPT

eLearnSecurity is a company that offers a wide range of technical cybersecurity certifications:
- eCPTXv2 : eLearnSecurity Certified Penetration Tester eXtreme
- eCPPTv2 : eLearnSecurity Certified Professional Penetration Tester
- eJPT : eLearnSecurity Junior Penetration Tester
- eWPTXv2 : eLearnSecurity Web application Penetration Tester eXtreme
- eWPTv1 : eLearnSecurity Web application Penetration Tester
- eCXD : eLearnSecurity Certified Exploit Developer
- eMAPT : eLearnSecurity Mobile Application Penetration Tester
- Threat Hunting, Forensic, …
These certifications are more affordable than the OSCP or the CEH (€339 per certification, €170 for the eJPT). The company’s recent visual identity might lead you to think it’s a new player on the pentest training scene. A little research is enough to disprove that assumption; we then learn that eLearnSecurity has existed for more than 10 years.
- Pros
- Financially affordable certification.
- Several technical levels are offered (various reviews indicate that the eCPTX is harder than the OSCP).
- The training on offer seems recent and the materials modern
- Cons
- The organization does not directly provide the training (certification only). However, a partner offering all the materials is available at a rate of €40/month.
Let me reiterate that this is a purely personal opinion. I encourage you to visit the organization’s website to form your own opinion.
As for me, I chose the OSCP mainly because of the certification’s reputation among recruiters in France. The substantial course content (800 pages), recently updated, also confirmed this choice.
A quick overview of the OSCP
Offensive Security

Offensive Security is an American pentest and forensics company founded in 2007. The company notably maintains the pentest distribution Kali Linux (formerly BackTrack), as well as the ExploitDB site, the Google Hacking Database, and the pentest tool Metasploit.
The company offers a range of pentest training, including the OSCP, which is their entry-level certification. This certification is, in my view, the best-known one in the pentest field. All of Offensive Security’s certifications are taken through practical exercises, unlike some organizations that opt for multiple-choice tests.
PWK Course

The certification comes with a “PWK” (Pentest With Kali) course consisting of a PDF of over 850 pages, as well as more than 17 hours of explanatory videos, all in English. Access to these resources is unlimited but must remain personal: the documents (video and PDF) are watermarked before being provided. Note also that Offensive Security reserves the right to invalidate all of its certifications in the event of an information leak. Although the course name suggests using Kali, the training actually applies to all operating systems, even though a Linux system is strongly recommended.
PWK Lab
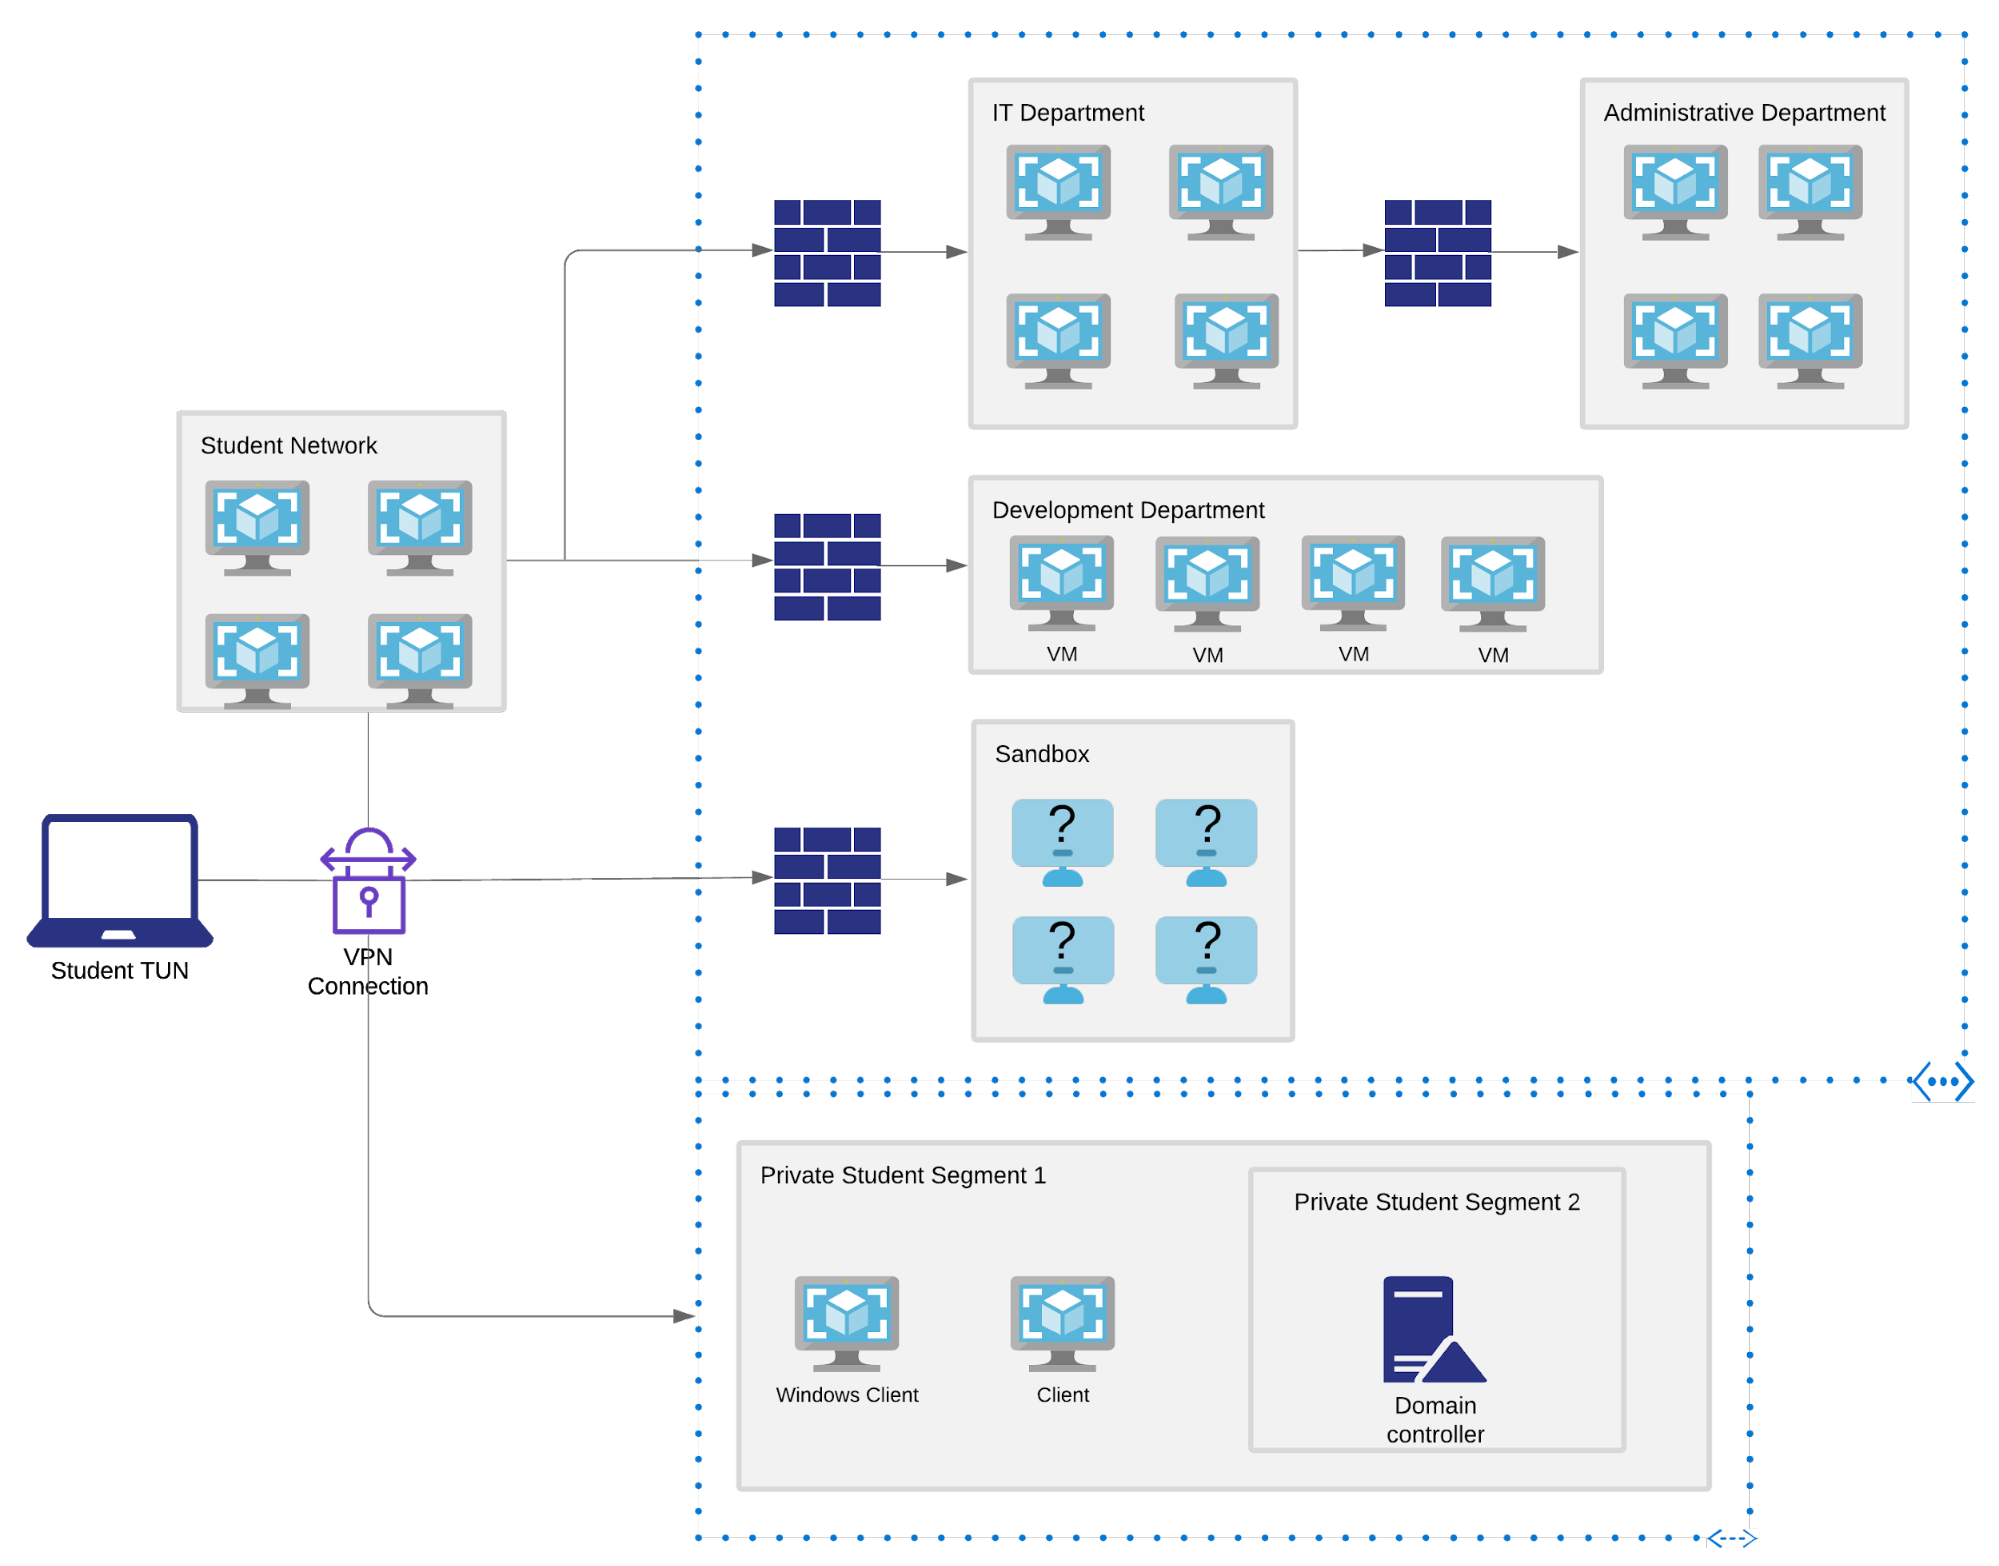
On top of this course comes a virtual environment, also called the “Lab”. This environment is made up of more than 70 machines (some of which are former exam machines). These machines are spread across several subnets in order to make it possible to cover the pivoting part of the course. Access to the lab is through an openvpn profile. The lab includes a network reconnaissance component: the IP addresses of the machines, gateways, and DNS servers are deliberately omitted from the lab description.
Price
The prices initially offered by Offensive Security are in US dollars. The prices in euros do not account for any fees your bank may charge. As for me, I chose the Course + 60 days package at €1017 and did not incur any additional fees. Regarding the lab duration, I recommend access of 60 days minimum (I’ll come back to this duration later in the article).
| Package | Price ($) | Price (€) |
|---|---|---|
| Course + 30 days of lab access + one OSCP exam | $999 | €847 |
| Course + 60 days of lab access + one OSCP exam | $1199 | €1017 |
| Course + 90 days of lab access + one OSCP exam | $1349 | €1143 |
| Course + 365 days of lab access + 2 OSCP exams | $2148 | €1821 |
| Retake | Price ($) | Price (€) |
| OSCP exam retake fee | $249 | €211 |
| Lab Extension | Price ($) | Price (€) |
| 30-day Lab Extension | $359 | €304 |
| 60-day Lab Extension | $599 | €508 |
| 90-day Lab Extension | $799 | €677 |
Proving Grounds
To prepare for or supplement the OSCP, since 2021 Offensive Security has also offered a “Proving Grounds” lab with a free part (PG Play) corresponding to the Vulnhub VMs, and a paid part at $19 per month (PG Practice) with machines similar to the PWK lab. This lab can also be seen as a training ground for people who don’t want to take the OSCP certification.
Course content
The Syllabus of the PWK course is freely available on the Offensive Security website. It notably lists the various topics covered by the course (non-exhaustive list):
- Penetration Testing: What you should know. (This covers the risks of reckless pentesting, along with some anecdotes about certain techniques …)
- Getting familiar with Kali Linux. (Tutorial on installing and getting started with the Kali Linux distribution.)
- Command Line Fun. (A review of basic bash commands, particularly for networking and the file system.)
- Practical Tools. (?)
- Bash Scripting. (Creating custom scanners.)
- Passive Information Gathering. (OSINT methodologies are notably covered in the course.)
- Active Information Gathering. (OSINT methodologies are notably covered in the course.)
- Vulnerability Scanning. (Using NSE scripts and certain scanners such as Nikto and Nessus.)
- Web application attacks. (SQL injection and code/command injection …)
- Introduction to Buffer Overflows. (Basic Linux/Windows stack overflows with hands-on use of debuggers.)
- Windows Buffer Overflows. (Basic Windows stack overflow with hands-on use of debuggers.)
- Linux Buffer Overflows. (Basic Linux stack overflow with hands-on use of debuggers.)
- Client-Side Attacks. (XSS, Office macros, …)
- Locating public exploits. (Discovering exploit-db.)
- Fixing exploits. (Learning to spot the blocking points of exploits in order to adapt them to our context.)
- File Transfers. (Uploading and downloading on Windows and Linux via various protocols.)
- Antivirus Evasion. (Using msfvenom and simple evasion techniques.)
- Privilege Escalation. (Presentation of various privilege escalation techniques on Windows and Linux.)
- Password Attacks. (Using “remote” bruteforce tools such as Hydra and “local” ones such as John.)
- Port Redirection and Tunneling. (The lab offers many possibilities, with most machines isolated from the internet.)
- Active Directory Attacks. (The lab offers several different Active Directory environments. For each environment, several exploitation paths are possible.)
- Metasploit Framework. (Getting familiar with the framework, configuring advanced options.)
- Powershell Empire Framework. (Discovering the Empire framework.)
- …
Overall, I found the course content thorough and heterogeneous. The lab complements the course by putting us up against the problems discussed during the PWK course. For example, using the Crowbar tool covered in the course for RDP bruteforce will generally work better than Hydra. The environment offers a multitude of vulnerable services (FTP, SSH, RDP, HTTP, SNMP, SMTP, SMB, LDAP, Kerberos, RPC/NFS, TFTP, MSSQL, MySQL …) and therefore doesn’t rely solely on web vulnerabilities.
My starting level
 As mentioned in the paragraph about my motivations, I’m a passionate young pentester fresh out of engineering school. At this precise moment I’m 23 years old and I have already carried out several pentests, mostly on web environments. I had also taken part in many CTFs (around thirty), mainly with my team Aperi’Kube, and even organized a few. As for challenge platforms, I was relatively active on Root-Me. On the other hand, I was not very active on sites like HackTheBox or TryHackMe. Finally, I already had a particular ease with scripting (python3), which came in handy during my preparation and on exam day. Before committing to this certification, I had already identified certain gaps. First there was my lack of skills in Windows environments (notably due to a lack of professional opportunities). Then, my skills related to exploiting Buffer Overflow-type binaries were limited (and still are 😅).
Despite my experience, similar to that of many friends who took the OSCP, I was, like many, apprehensive about this certification. The feeling of not being “competent” enough, along with self-funding this certification, only delayed my decision. I finally took advantage of the health situation and the kind encouragement of my friend Maki to commit to this certification. In hindsight, I regret not taking the plunge sooner.
Important: My personal experience is by no means a prerequisite for taking the OSCP. The skills needed to obtain the certification are fully covered in the course. In my opinion, the prerequisites for aspiring to this certification are, above all, diligence during your preparation, as well as having computing fundamentals. Prior pentest experience will help you grasp the course more easily, but will not exempt you from studying.
My preparation before the PWK course
Hack The Box

My decision to take the certification did not translate directly into buying the OSCP package, but into intensive training on the Hack The Box lab. For that I subscribed to the VIP offer at £10/month (~€12/month). VIP access provides the retired boxes (vulnerable machines), a quieter study environment, more stable machines, and less risk of being spoiled by other registered members. I reckon I learned at least as much on this lab as on the one provided by Offensive Security. It is also much more affordable than the PWK lab and deserves consideration when buying your training package.
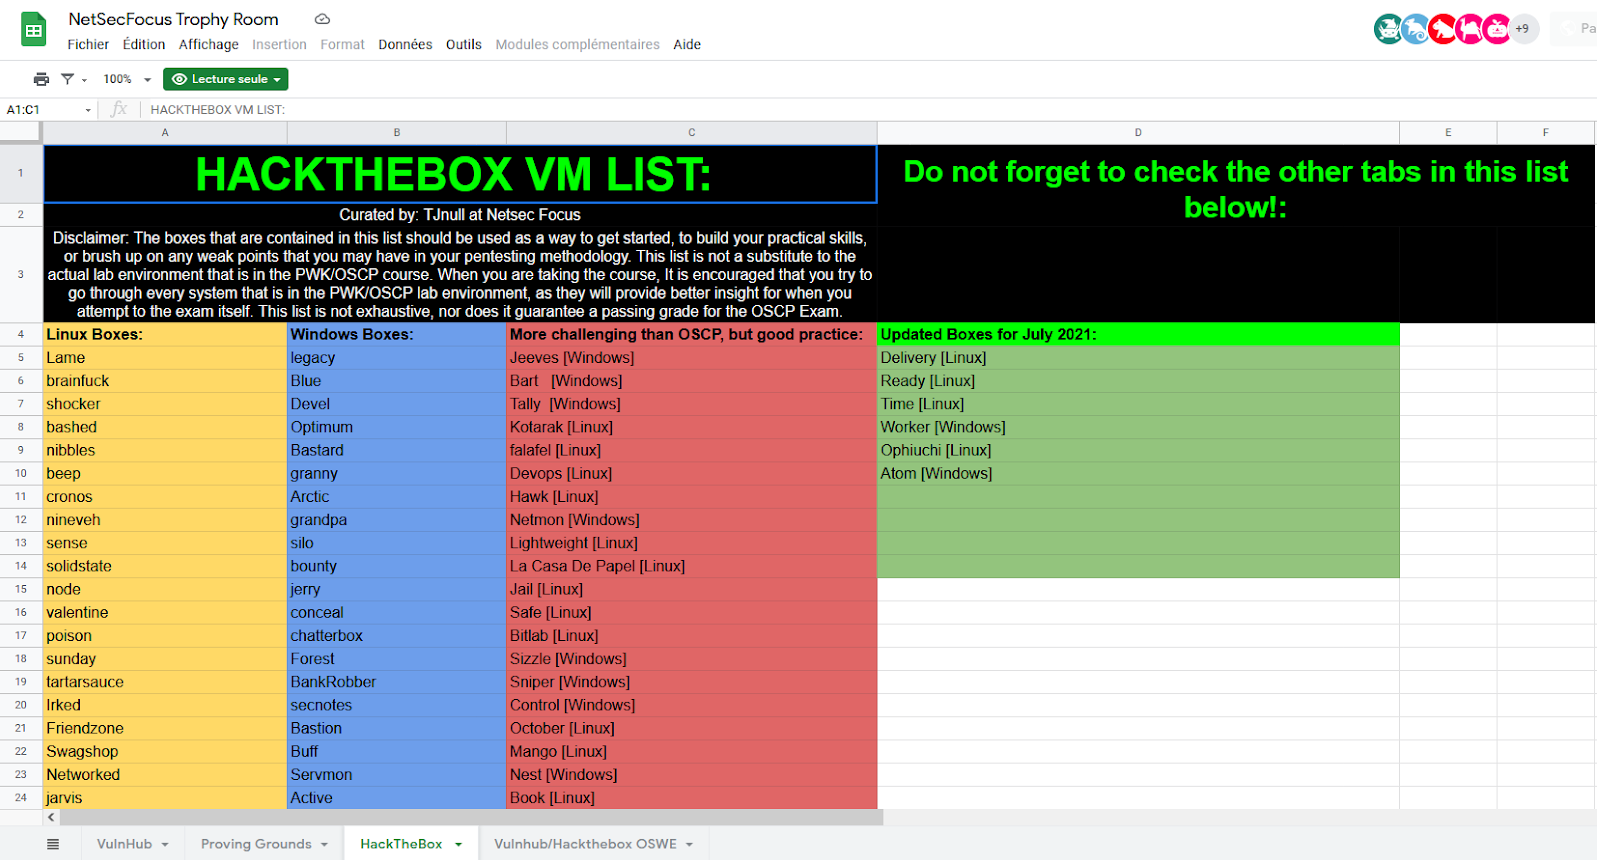
Overall, the boxes on HackTheBox are more difficult than those in the PWK lab (and go beyond what the OSCP expects). So the choice of HTB boxes wasn’t made at random. Indeed, there are several community lists enumerating the boxes relevant to OSCP preparation:
Just like the PWK lab, the boxes on HTB generally have a first step consisting of compromising a system user, then a second step consisting of compromising the machine’s administrator. In the rest of the article, I’ll use the term “rooting” a box, which is equivalent to compromising the administrator.
From October 2020 to early January 2021, I rooted nearly 60 retired HTB machines, i.e. one box every two days for 4 months, in increasing order of difficulty. I carried out this sprint during study periods mostly outside my working hours, in the evening from 6 p.m. to midnight, and on weekends. I completed most of these boxes without the help of write-ups (walkthroughs), except when a box became too time-consuming. This trade-off between the time spent searching and the concept being taught is a parameter that can be hard to gauge. So I recommend that people who haven’t practiced “CTF”-type challenges not use these write-ups to start with, even if it means spending several days on a box. Indeed, too many people fail their exam after getting too used to relying on walkthroughs (this also applies to the PWK lab). For everyone else, it’s a personal choice, but keep in mind that too much “Try Hard” on a particular technology can sometimes distract us from our main goal.
I haven’t discussed Offensive Security’s “Proving Grounds” lab here, which could have been a good candidate as a pre-OSCP training environment. It has the merit of being the closest to the PWK lab, since it’s offered by the same company. However, I felt HTB was more relevant, because the quality of its boxes and the diversity of the technologies covered are well recognized; moreover, the HTB lab covers a scope that complements the PWK lab (and Proving Grounds).
Note-taking
While working through these boxes, I kept a personal wiki up to date in order to record my commands and techniques in an organized way. I opted for a GIT repository with MarkDown files, as well as scripts. Here is an excerpt of the structure:
├── 21 - FTP.md
├── 25,143,587 - SMTP & IMAP.md
├── 80,443 - WEB.md
├── Bruteforce
│   ├── local.md
│   └── remote.md
├── index.md
├── Linux
│   ├── Privesc.md
│   ├── setuid2.c
│   ├── setuid.c
│   └── ...
├── Pivoting
│   ├── index.md
│   ├── local_port_fwd.py
│   ├── socks5_py3.py
│   └── ...
├── ReverseShell
│   ├── index.md
│   ├── Invoke-PowerShellTcp.ps1
│   ├── Msfvenom.md
│   ├── perl-reverse-shell.pl
│   ├── php-reverse-shell.php
│   └── ...
└── Windows
    ├── 111 - RPC - NFS.md
    ├── 139, 445 - SMB.md
    ├── 1433 - MSSQL.md
    ├── 161 - SNMP.md
    ├── 389, 636, 3268, 3269 - LDAP.md
    ├── 69 (UDP) - TFTP.md
    ├── 88 - Kerberos.md
    ├── BufferOverflow
    │   ├── bof_step_1.py
    │   ├── bof_step_2.py
    │   ├── bof_step_3.py
    │   ├── bof_step_4.py
    │   └── Methodo
    ├── index.md
    ├── LSASS.md
    └── Privesc.md
In order to navigate and search these notes, I used the VSCode IDE:
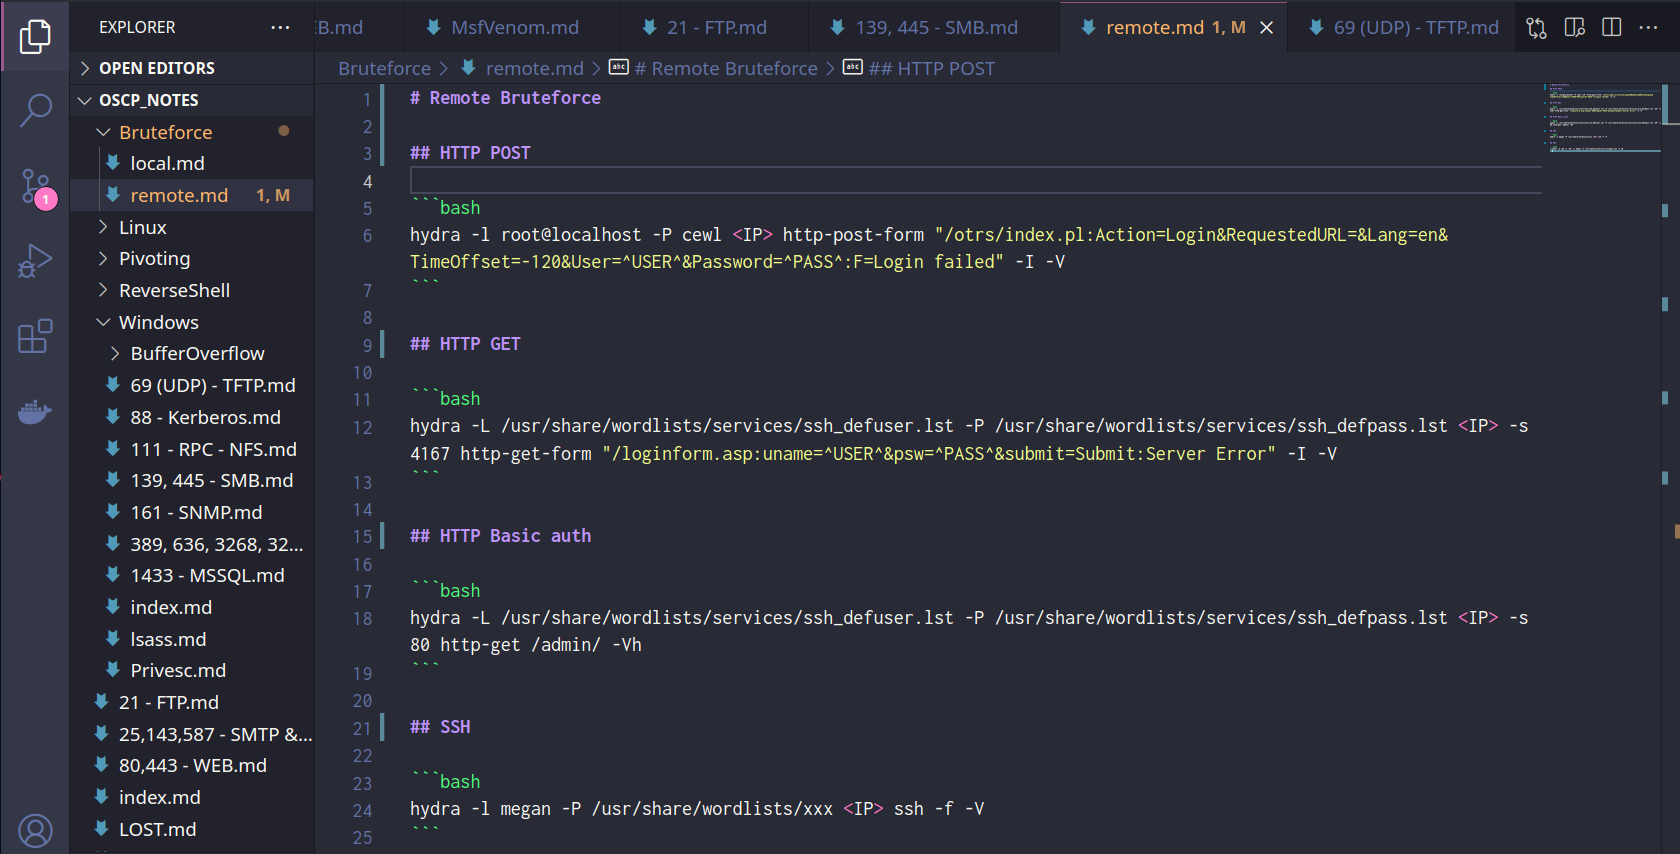
This personal note-taking is, in my view, essential to progress and obtain the certification. Some pentesters will opt for different tools, such as CherryTree. Access to your wiki as well as to public wikis is allowed at all times, including during the exam.
Among the resources in my bookmarks, I’d like to share the following, which I found useful for taking this certification:
- HackTricks: A comprehensive wiki describing methodologies by protocol or environment
- PayloadAllTheThings: A database of payloads, bypasses, and methodologies
- ired.team: A Red teaming-oriented wiki
- GTFOBins: GTFOBins is a site that lists Unix binaries that can be used to escalate privileges, escape restricted shells, set up various shells, transfer files, …
- WADComs: The equivalent of GTFOBins for Windows/AD environments
Prior training?
To reduce training costs, it can be useful to train beforehand with the goal of minimizing your lab time (and limiting the number of exam retakes). The PWK course and the PWK lab are provided at the same time. It is therefore not possible to read the course before the lab time countdown begins. Unfortunately, I don’t have any particular training to recommend (other than PWK!); however, here are some articles covering part of this training that are worth going through beforehand:
- The “Buffer Overflows Made Easy” playlist from the YouTube channel “The Cyber Mentor”. The methodology covered there is identical to PWK’s.
- Tib3rius’s privilege escalation training for Linux and Windows
- The state of the art of pivoting by Noraj, in French or English
Course and Lab
After rooting a large number of boxes, I signed up for the OSCP package with 60 days of lab access. Offensive Security offers different course start dates (so as not to overload the shared lab). I was able to get a date on January 10, 2021, i.e. one week after purchasing my package. As with my pre-PWK preparation, I spread my work over hours from 6 p.m. to midnight on weekdays, and all day on weekends. The course was very time-consuming, and I spent 90% of my weekends studying. Fortunately, the lockdown reinforced the idea that I couldn’t go out anyway.
Course
I was able to read the PDF in its entirety; the videos provided are just a re-explanation of the PDF content. I only watched the video part about buffer overflows, as well as active directory. I already knew a large part of the course content, which is why I regret not taking the OSCP earlier. I still learned a few things, whether basic Linux commands or more advanced mechanisms. The course content properly follows the syllabus mentioned earlier in my post.
Weeks 1 & 2
The first two weeks of study let me get to grips with the various resources offered by Offensive Security: reading the course, the forum, VPN access, etc. I was also able to find my footing in the lab, run a first network scan, and root 2-3 machines. Reading the course suggests doing exercises. Most of them are time-consuming, and I had already had the chance to do them during my engineering school or in CTFs. So I deliberately skipped 90% of the exercises.
It’s worth noting that completing the exercises, together with writing a report, grants 5 extra points on the final exam. The sheer quantity of exercises is enough to fill 30 days of lab on its own. Moreover, the 5 extra points are only useful in certain very specific exam configurations (I’ll come back to this in the exam section). This is why many pentesters (myself included) choose to focus on the lab.
Weeks 3 and 4
From the third week on, a routine settled in, with a minimum of one box rooted per day. I started with the “low hanging fruits”, where enumerating the services is often enough on its own to identify the vulnerabilities. Almost all the boxes are full of “rabbit holes”: seemingly vulnerable services turn out to be mere traps designed to make you waste time.
Week 5
During the fifth week, I decided to tackle the “Big 5”. These are 5 machines renowned for their difficulty. The machines turn out to be slightly harder than the others, but with enough CTF experience and by taking my time on the reconnaissance phases, I was able to root the entire “Big 5”.
Week 6
By the end of the sixth week, I had been able to discover all the subnets, though several boxes were still holding out against me. Unlike the HTB lab, where the machines are not linked, some PWK lab machines depend on the post-exploitation of another machine. For example, cracking user hashes after compromising an AD can allow you to recover application accounts for another box.
Week 7
In the seventh week, I decided to do another pass over the Buffer Overflow exercises. I also started to “spoil” certain boxes for myself, in order to identify the prerequisites of some machines. The highly heterogeneous network features macro environments, and sometimes the network’s lack of realism leads us to forget certain post-exploitation steps. For my part, I had settled for cracking as many passwords as possible, which I put in a “PASSWORDS.txt” wordlist (likewise for users with “USERS.txt”). Unfortunately, that’s not enough.
Week 8
I focused my last week on preparing for my exam, working on the concepts I felt I had poorly mastered or insufficiently covered.
To conclude on the lab: it was 60 intense days, and too short, even with good preparation. Just like the HTB lab, the PWK lab allowed me to feed my wiki.
Exam preparation
My lab ended on March 10. One month before the end of this lab, I was able to schedule an exam date for March 12. Weekend slots are rare, so I advise you to schedule your exam date as soon as possible (you can push this date back several times).
Before the exam, I prepared a report template based on the one provided by Offensive Security, but also the one offered by Noraj in his GitHub repository. Creating such a template is a valuable time saver that you should take into account. I also re-read all the rules relating to the exam (exam duration of 23h45, restrictions on Metasploit, professional tools prohibited, automated exploitation prohibited, mandatory proofs in the report…). I also set up fallback solutions in case of problems: checking your phone credit in case of an internet outage, setting up a backup PC if possible, checking whether you have a second webcam, etc. Finally, check your stock of energy drinks and/or coffee, and rest the day before your exam.
How the exam unfolds
The OSCP exam lasts 23h45, to which 24h dedicated to writing the report are added. You are of course allowed to take as many breaks as you like.
Proctoring
The exam has recently become “proctored”: you must share all of your screens as well as your webcam throughout the exam (except during the write-up). This sharing is done easily thanks to the Janus WebRTC Screensharing plugin. When the exam starts, the proctor will then ask you to show your ID card, as well as to pan around the room with your webcam. Once the verification process is complete, the proctor will send you the exam procedures. They will then contact you if the camera or a screen is lost. Conversely, you will be asked to notify the proctor when you take breaks.
OS
You are free to choose the OS used to take the exam as long as you can satisfy the OpenVPN connection as well as the proctoring. Having studied mostly on ArchLinux, I opted for an ArchLinux host + a Kali and Windows VM for the exam. I advise you to keep the same environment between your preparation and your exam, and to avoid updating the day before the exam. A Kali Linux and Windows environment, at least in a VM, is strongly recommended; mainly for certain tools packaged in older versions, or for compiling Windows binaries.
Scoring
To pass the OSCP exam, a score of 70 points minimum is required. These points are awarded based on the degree of compromise of the various exam boxes. To date, the only exam format I have come across in the various OSCP reviews was the following:
| Task | Description |
|---|---|
| A lab exercise list worth 5 points | A large list of exercises to prepare ahead of the exam. |
| A machine worth 10 points | A machine with no privilege escalation; it’s a service running as root or Administrator, requiring you to adapt an exploit or a simple technique. |
| A machine worth 20 points | A user + administrator compromise is expected. |
| A machine worth 20 points | A user + administrator compromise is expected. |
| A machine worth 25 points | A user + administrator compromise is expected. |
| A machine worth 25 points | This is a Buffer Overflow, presumably on Windows. The service is exposed on a port, and RDP access to a copy of the machine is provided. The RDP machine does not hold the proof (or flag), and has a debugger. No privilege escalation is expected. |
Just like the lab, all the boxes are riddled with “rabbit holes”. However, good preparation will let you identify them quickly. There is no fixed “ratio” of Windows/Linux/other. In other words, nothing rules out ending up with 4 machines running FreeBSD 😂.
Regarding the 5-point exercise list, you’ll quickly understand that there are few scenarios in which these 5 points would help you reach 70pts.
Finally, the number of points is not directly representative of a box’s difficulty. You’ll see, for example, in the next section that the 10-point machine was the last machine I managed to root.
My run
As a reminder, my exam started on 12/03/2021 at 8:10 a.m. Here is a detailed recap of my day:
- 9:15 a.m. [25 pts]: Rooted the Pwn machine (Buffer Overflow) worth 25 pts.
- 10 a.m.: I find an unstable payload for the 10-pt machine; a socket opens, but the exploit is unstable 🙂.
- 2 p.m. [45 pts]: Rooted a 20-pt machine, still no 10 pts.
- 3 p.m. [65 pts]: Rooted a 20-pt machine, still no 10 pts 💀.
- 4 p.m.: User shell on the 25-pt machine, and discovery of the privilege escalation. I don’t feel like exploiting it with the Metasploit framework. Still no 10 pts.
- 7 p.m. [90 pts]: Rooted the last 25-pt machine (with and without Metasploit), only the 10-point machine remains 💀💀.
- 8 p.m. [100 pts]: After 10h of tryhard, the unstable exploit for the 10-pt machine finally goes through for no apparent reason 😭.
I was able to use the time I had left to check all of my proofs and screenshots. I also started writing the report.
Results
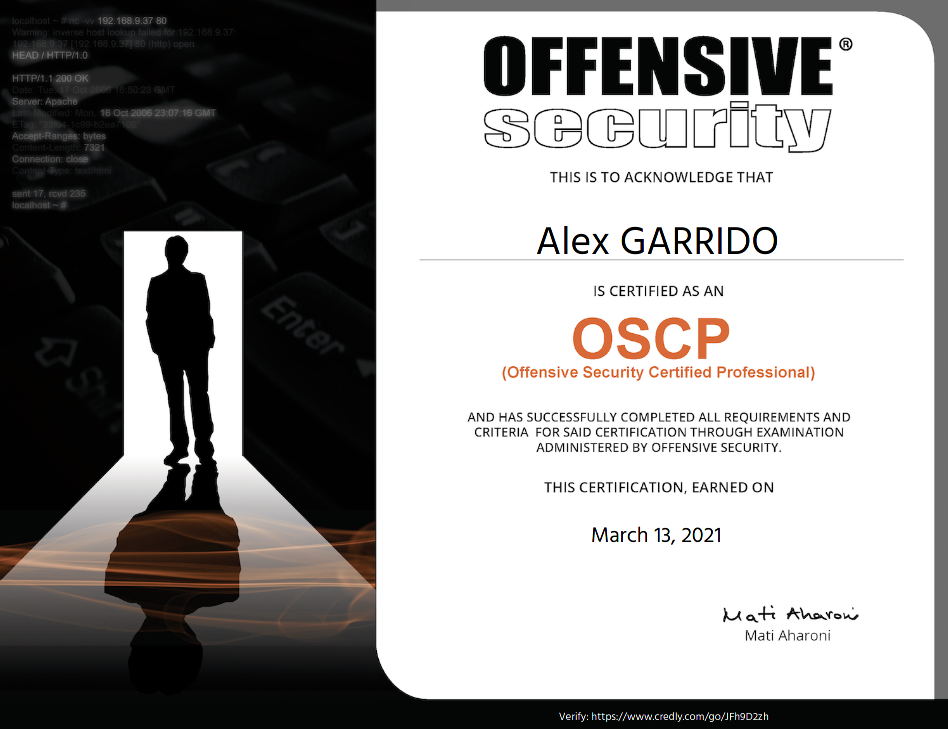
Three days after submitting my report, I successfully received the OSCP certification 🙂.
What next?
The end of the lab and taking the exam left a great void. My evenings were no longer paced by intensive study. However, the lack of technical challenge made itself felt again, and the global COVID-19 crisis was still ongoing. That’s why, after a few months’ rest, I decided to dive back into a new certification: the OSWE. It’s a slightly more advanced pentest certification, delivered by Offensive Security, which more specifically covers auditing web applications with a white-box approach. If you’d like to know more, I’ve published a similar article about my experience taking the OSWE.
Acknowledgments
I thank my family, friends, and colleagues who contributed in one way or another to my obtaining this certification, and in particular: